Category: Uncategorized

  • Using coloringbookmaker.art for grief therapy

    This post is dedicated to my dearly loved aunt and uncle whom I lost in 2019 and 2020.

    If you are reading this post, there might be a possibility that you have recently lost a loved one, so first I’d like to offer my condolences and my deepest sympathy.

    Whether you have recently lost a pet, family member or a friend, the grieving process can be a gut wrenching journey that leaves you feeling empty. You are not alone. We all lose someone or something close to us in our lifetime. Some hit harder than others. But one thing is for sure, no matter how prepared we think we are, we are never prepared.

    The Five Stages of Grief:

    Denial or shock. Sometimes it feels unbelievable. You have a hard time registering they are gone. Sometimes there is a delayed reaction- this is actually quite common. It can be a few hours, days, or even weeks.

    The second stage of grief:

    Anger and confusion set in. Why did it have to happen? How did this happen? Some may question God’s motives, or why they even get close to people or pets when the pain is so great.

    The third stage of grief:

    Guilt and alternative outcomes. Even if you have done everything you possibly could, and did it perfectly, guilt sets in. This is perfectly normal. Your brain rehashes alternative life paths that could have saved them. This is also normal. One thing to remember is that if it wasn’t supposed to happen, it wouldn’t have. When I lost my uncle, I hit this stage for a long time. Then I ran across a poem, on accident, as if gifted by my uncle to me. This poem, Desiderata by Max Ehrmann (1927) states, “and whether or not it is clear to you, no doubt the universe is unfolding as it should, therefor be at peace with God, whatever you conceive him to be”. So trust the plan, destiny, or your timeline-but it all happens in it’s place.

    The fourth stage of grief:

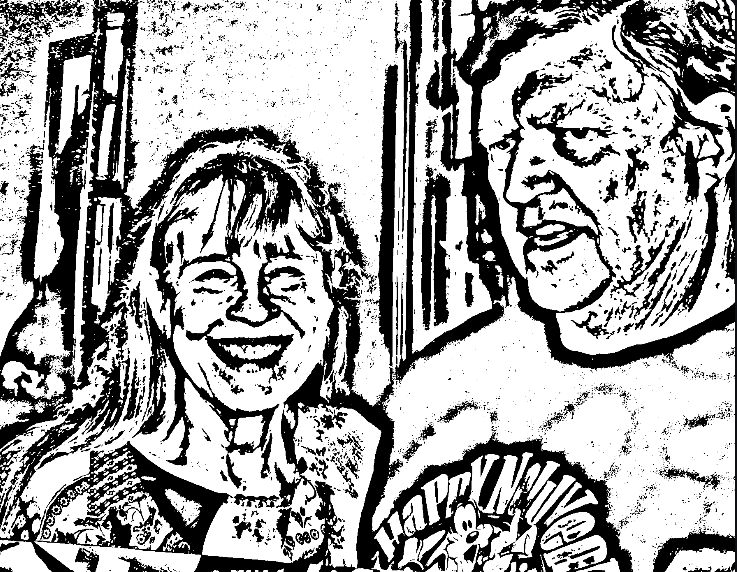
    Depression. This is where deep sadness seeps in. If your not careful, it can consume you. This is the stage that I find art therapy helpful. Take a picture of your loved one, or a picture of you and your loved one, and uploaded it into the tool, take your time coloring it. It can help process the memories, process the death, and come to terms with your loss. Art therapy activates more parts of your brain than just talking. There has been many scientific studies on this, and art therapy can be an excellent way to process grief. Painting my aunt after she passed helped me in such a great way. Looking at her eyes, feeling her love, it was such an amazing experience to be able to work through grief with art. Another good thing to do in this stage is to start setting goals and plans. Things you want to accomplish, things you want to do, places you want to visit. Write them down, make a goal board. It is hope that gives us a bridge between depression and acceptance.

    The last stage is acceptance. You won’t forget them. The pain will still hit, even years later. It’s not about living without the pain, or without the memories. It’s relearning how to live your life without them in it. Eventually, you learn how to live without them in your life. It is hard in the beginning, getting out of routine. Routine walks, talks, routine plans with whomever you lost. Now you have to learn a new routine. One without them in it. I know. It sucks. But we all get to this new life, we adjust, we grow, and then we can help others do the same. For more information on losing a loved one or dealing with grief, I recommend good-grief.org. It’s a pretty good website with more resources and information.

  • Why a Personalized Coloring Book Means More Than a Store-Bought One

    Coloring books are everywhere — in stores, online, even in waiting rooms. Kids love them because they’re fun, creative, and full of imagination. But nothing compares to the magic of a personalized coloring book made just for your child. It’s more than an activity; it’s a gift from the heart.

    Personalized coloring books turn simple pages into memories. They show your child:

    “I see you. I know what you love. And I made this just for you.”


    🌟 

    Why Personalized Coloring Books Are So Meaningful

    1. Your child becomes the hero of the story

    Most store-bought coloring books are generic — animals, shapes, and characters they’ve never met.

    But a customized book can put your child at the center of every page.

    Kids light up when they see:

    • Their name
    • Their interests
    • Their favorite animals
    • Familiar places
    • Pages that feel like them

    It gives them a sense of identity and belonging, something a mass-produced book simply can’t offer.


    2. It strengthens connection & emotional bonding

    When you make a personalized coloring book, you are quietly telling your child:

    “I pay attention to who you are.”

    You’re celebrating their uniqueness — their favorite colors, their dreams, their little quirks.

    This builds emotional security and deepens your bond in a soft and powerful way.


    3. It becomes a keepsake worth saving

    Store-bought coloring books get used up and tossed out.

    A personalized book becomes a memory:

    • A snapshot of who your child was at that age
    • A heartfelt reminder of what they loved
    • A treasure you can look back on together years later

    It becomes part of your child’s story.


    4. It boosts creativity and confidence

    When children see themselves in the pages of a book, they feel important.

    They feel like their ideas matter.

    A custom coloring book encourages:

    • Imagination
    • Self-expression
    • Storytelling
    • Fine motor skills
    • Decision-making

    It becomes more than a coloring activity — it’s a tool for growth.


    🎨 

    What Images to Include in Your Child’s Personalized Coloring Book

    Every child is different, so the magic comes from tailoring the book to your child.

    Here are wonderful ideas you can include:


    ⭐ 

    1. Their Favorite Animals

    Simple or detailed line-art pages featuring:

    • Cats, dogs, horses
    • Dinosaurs
    • Tigers (a great one!)
    • Sea creatures
    • Butterflies or birds

    Choose animals they talk about, draw, or play with.


    ⭐ 

    2. Pages With Their Name in Different Designs

    Kids LOVE seeing their name.

    Create pages like:

    • “Emily’s Magical Garden”
    • “Superhero Jackson”
    • “A Day in Lily’s World”

    A whole page dedicated to their name decorated with stars, hearts, or shapes is a memory they’ll keep.


    ⭐ 

    3. Family-Themed Pages

    Include outlines that represent:

    • Your child
    • Parents
    • Siblings
    • Pets
    • Grandparents

    These don’t have to be realistic portraits — simple and fun is perfect.


    ⭐ 

    4. Scenes from Their Everyday Life

    Children feel comforted by familiar places:

    • Their bedroom
    • Their school
    • Their backyard
    • A playground
    • A beach they love
    • A road trip scene (great for RV families!)

    These become “real life in coloring form.”


    ⭐ 

    5. Empowering pages with positive words

    You can add coloring pages with gentle affirmations, such as:

    • I am brave
    • I am loved
    • I am kind
    • I am creative

    These turn coloring time into confidence-building time.


    ⭐ 

    6. Big dreams & imagination pages

    Let their imagination soar by including pages like:

    • Your child as a superhero
    • Riding a magical tiger at sunrise
    • Exploring space
    • Swimming underwater with friendly sea life
    • Holding a handful of glowing stars

    These pages encourage storytelling and inspire creativity.


    ⭐ 

    7. Holiday or birthday pages

    These add charm and mark special moments:

    • Birthday cake with their age
    • Christmas tree they can decorate
    • Halloween costumes
    • Spring flowers
    • Summer beach scenes

    This makes the coloring book timeless and seasonal.


    💛 

    The Heart Behind It All

    A personalized coloring book is not just about ink and paper.

    It’s about presence.

    It’s about pausing long enough to create something meaningful for the little person who looks up to you.

    Your child will remember the feeling of being seen.

    Not the book itself — but the love you poured into it.

    They may outgrow toys, clothes, and characters…

    but they never outgrow feeling loved.


    🌈 

    Ready to Create One for Your Child?

    Whether you draw the pages yourself or use a coloring book creator, the most important thing is the heart behind it. Your child will feel that love every time they open their special book.

    Terms of Service
    Privacy Policy


    PP

  •  Turn Any Photo Into a Wood Burning Design

     Turn Any Photo Into a Wood Burning Design

    Have you ever wanted to burn a beautiful, detailed image into wood — but struggled to trace it cleanly? My free Coloring Book Tool makes it easy to turn any photo into a simple black-and-white outline that you can trace directly onto wood for pyrography projects.

    In this post, I’ll show you exactly how to go from photo → outline → wood burning art.

    Step 1: Choose the Perfect Photo

    Start with a clear, high-contrast image — something where the subject stands out from the background. You can choose your own photos or look on free websites like pixabay.com that allow you to use photos at your disposal.

    • Good choices: animals, flowers, faces, trees, or landscapes with strong shapes.
    • Avoid: blurry or low-contrast photos, as fine details may disappear in the outline.

    Screenshot

     Step 2: Convert Your Image with the Coloring Book Tool

    1. Go to https://www.coloringbookmaker.art/.
    2. Upload your photo using the “upload image” box.
    3. Adjust the contrast or detail level, line thickness, etc. until you get a clean, simple line version in the “Result” box. Directions 1-3 all listed on the website, as well as additional instructions at the bottom off the website.
    4. Download, print or screenshot the black-and-white image.

    (Example below: original photo of cat on pixabay.com → black-and-white outline ready for tracing)

    Screenshot

    Step 3: Transfer the Design to Wood

    You can do this in several ways — pick the one that fits your setup best:

    Option 1 – Projector method:

    • Open your outline image on a tablet or projector.
    • Project it directly onto your wood surface.
    • Lightly trace the lines using a pencil or fine-tip marker.
    • Use a charcoal pencil for tracing on a projector or a tracing paper and blunt pen

    🔥 Step 4: Burn the Design

    Once your lines are transferred:

    1. Heat up your wood burning pen or tool.
    2. Start with light strokes first — you can always darken later.
    3. Outline the main shapes, then fill in shadows or textures as you go.
    4. Work in a well-ventilated area and take your time — pyrography is all about patience and flow.
    5. You can add a little color, I add watercolor sometimes.

    🌿 Step 5: Seal and Finish

    When the burning is complete, gently sand any rough edges, then apply a clear wood finish, oil, or varnish to protect your design.


    💡 Tips for Best Results

    • Simplify complex photos before converting (crop out busy backgrounds).
    • Experiment with different wood types — light woods like basswood or birch show burned lines beautifully.
    • If you’re new to wood burning, practice first on a scrap piece with your design.

    ✨ Conclusion

    Your Coloring Book Tool isn’t just for coloring pages — it’s a powerful creative helper for artists, wood burners, and DIY crafters. With just a few clicks, you can turn memories, pets, or favorite scenes into beautiful, permanent works of art on wood.

    April Turgutalp

  • Using Coloringbookmaker.art for practicing watercolor

    Using Coloringbookmaker.art for practicing watercolor

    You can practice using watercolor by printing a photo (free usable photos from pixabay) and adjust the sensitivity to light and line thickness to light, and leave most of the page with just a few hints of the subject. This way, it will show you where the darkest values are (black lines) and let you focus on using different colors instead of stressing about form, shape, proportion and shading. In this example, I used watercolor pens. I have not seen a difference in quality when it comes to watercolor pens, the cheapest is the same as most expensive, so I would save the expensive products for things that have a massive difference in quality, like pastels.