Have you ever wanted to burn a beautiful, detailed image into wood — but struggled to trace it cleanly? My free Coloring Book Tool makes it easy to turn any photo into a simple black-and-white outline that you can trace directly onto wood for pyrography projects.
In this post, I’ll show you exactly how to go from photo → outline → wood burning art.
Step 1: Choose the Perfect Photo
Start with a clear, high-contrast image — something where the subject stands out from the background. You can choose your own photos or look on free websites like pixabay.com that allow you to use photos at your disposal.
- Good choices: animals, flowers, faces, trees, or landscapes with strong shapes.
- Avoid: blurry or low-contrast photos, as fine details may disappear in the outline.

Step 2: Convert Your Image with the Coloring Book Tool
- Go to https://www.coloringbookmaker.art/.
- Upload your photo using the “upload image” box.
- Adjust the contrast or detail level, line thickness, etc. until you get a clean, simple line version in the “Result” box. Directions 1-3 all listed on the website, as well as additional instructions at the bottom off the website.
- Aim for strong outlines and minimal noise.https://www.coloringbookmaker.art/
- You can zoom in and make small edits if needed. Eraser or pen must be turned off first.
- Download, print or screenshot the black-and-white image.
(Example below: original photo of cat on pixabay.com → black-and-white outline ready for tracing)

Step 3: Transfer the Design to Wood
You can do this in several ways — pick the one that fits your setup best:
Option 1 – Projector method:
- Open your outline image on a tablet or projector.
- Project it directly onto your wood surface.
- Lightly trace the lines using a pencil or fine-tip marker.
- Use a charcoal pencil for tracing on a projector or a tracing paper and blunt pen

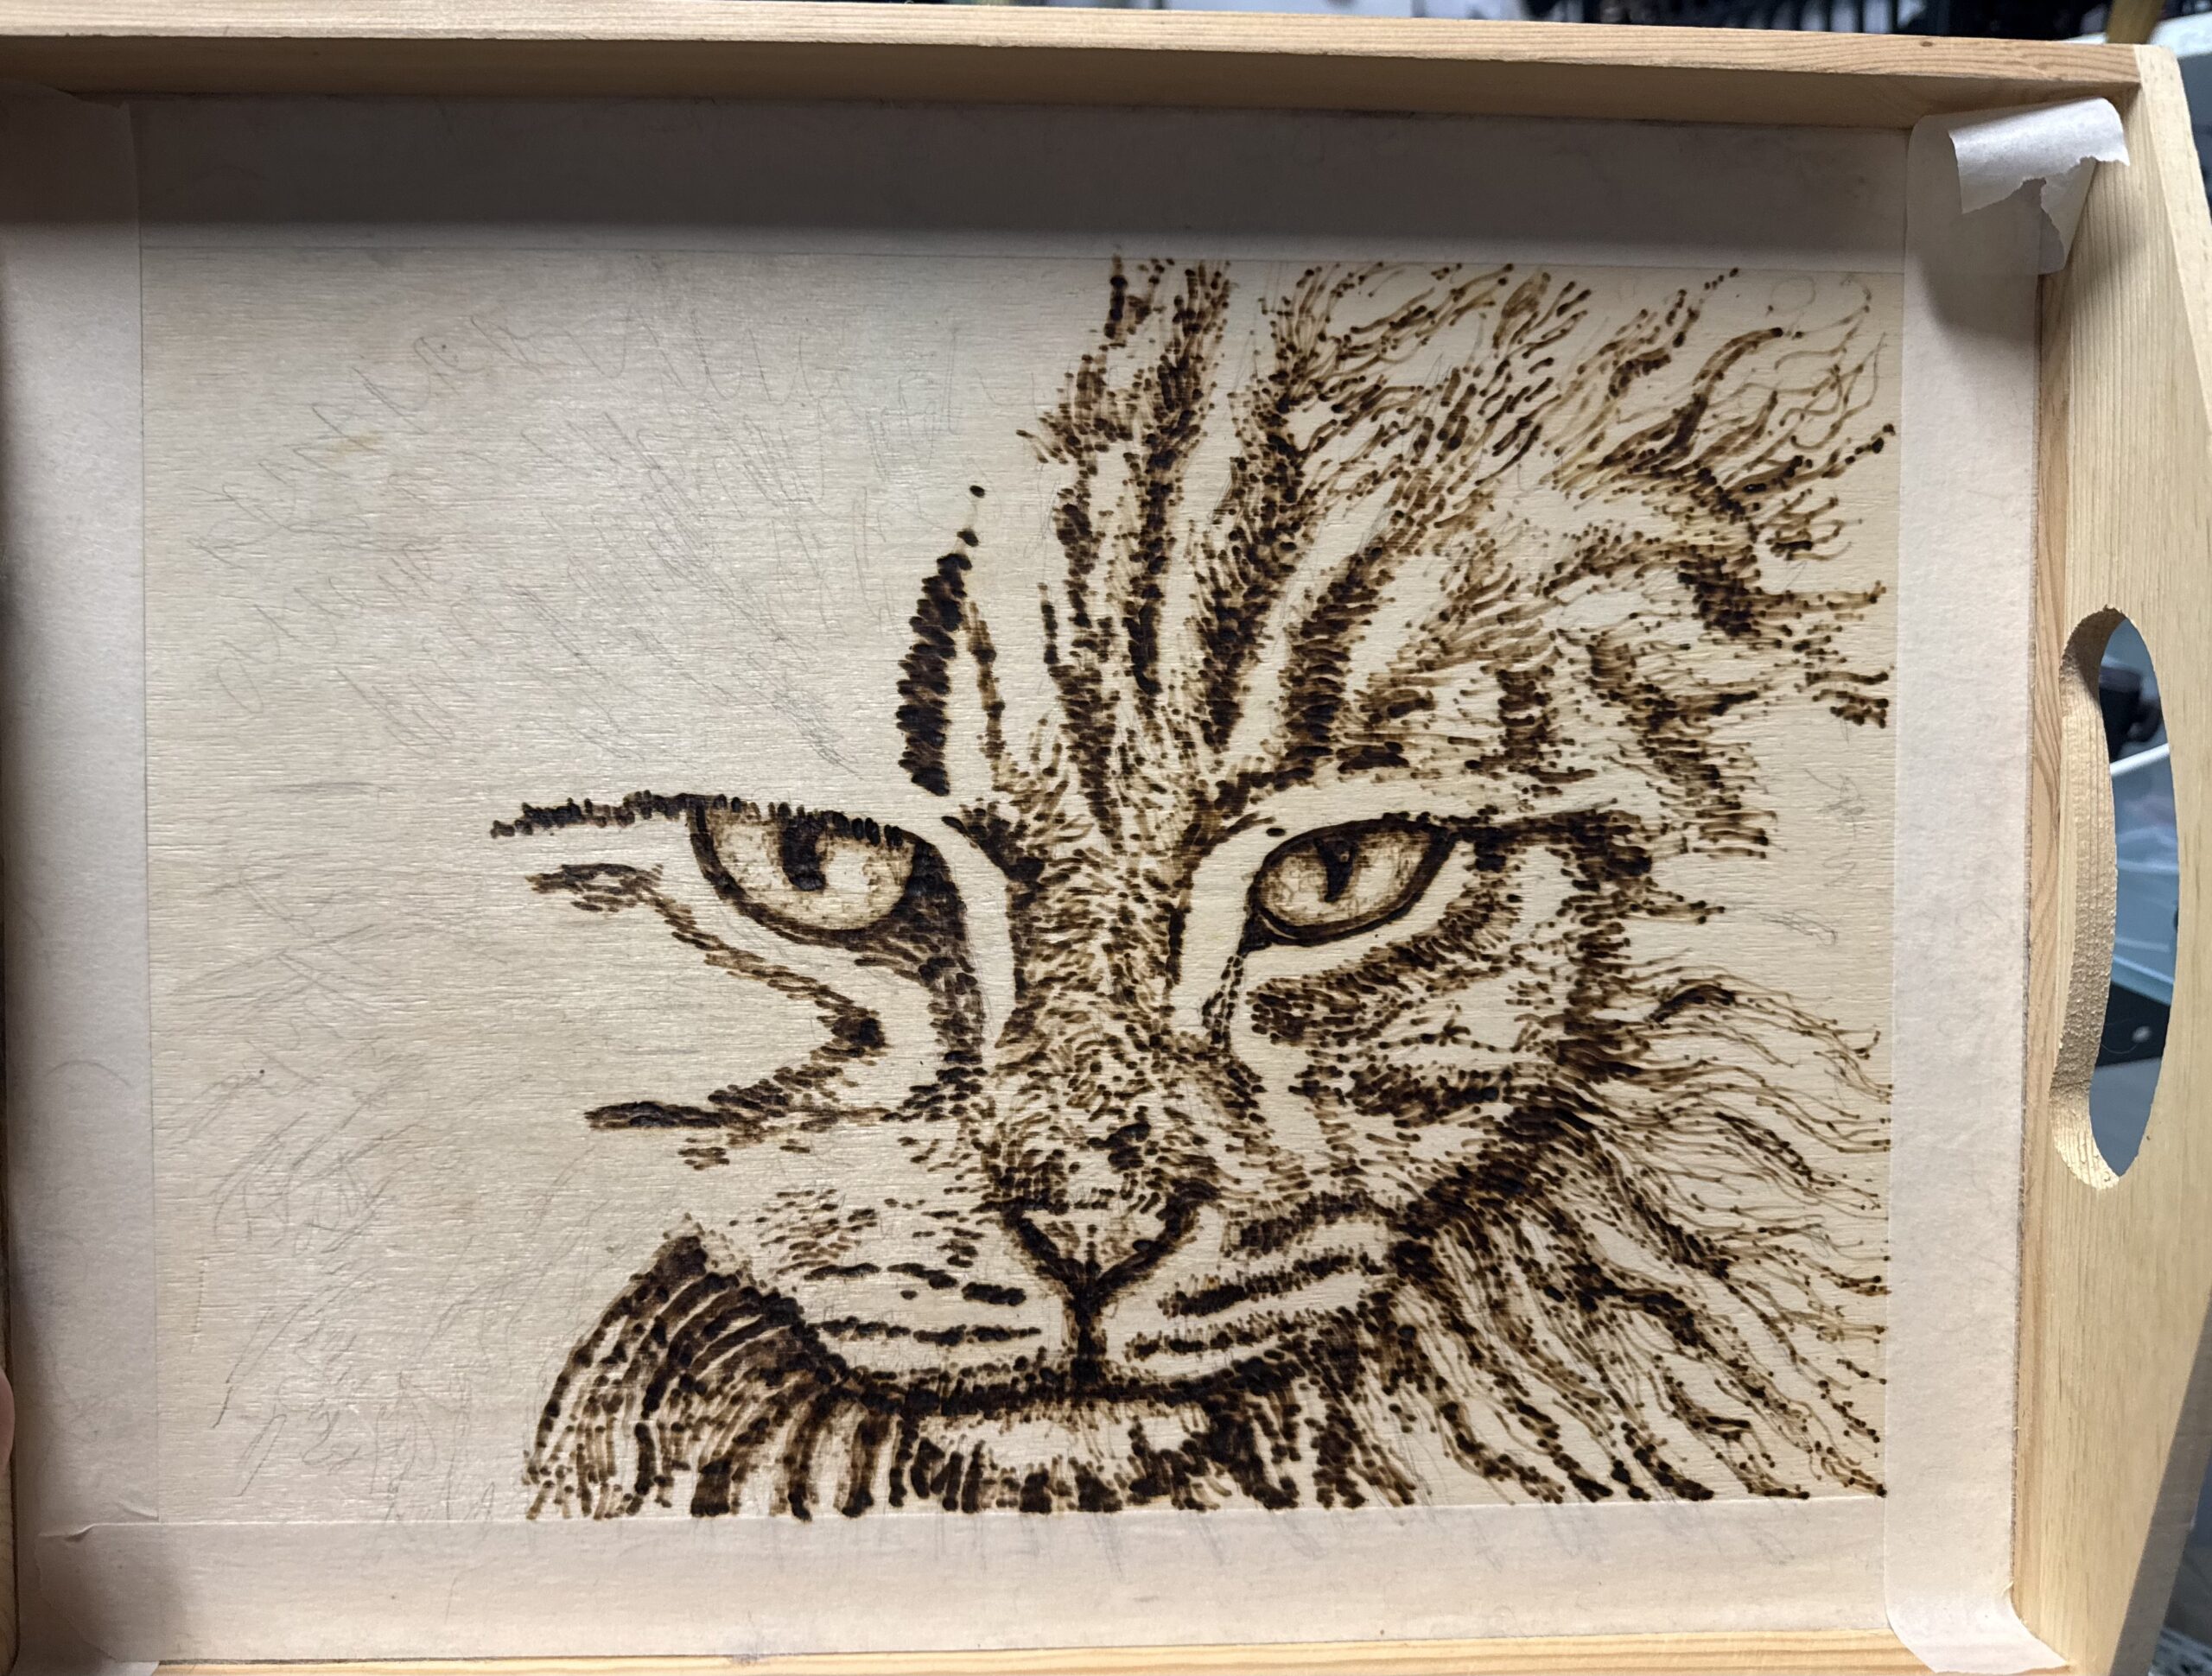
 Step 4: Burn the Design
Once your lines are transferred:
- Heat up your wood burning pen or tool.
- Start with light strokes first — you can always darken later.
- Outline the main shapes, then fill in shadows or textures as you go.
- Work in a well-ventilated area and take your time — pyrography is all about patience and flow.
- You can add a little color, I add watercolor sometimes.

 Step 5: Seal and Finish
When the burning is complete, gently sand any rough edges, then apply a clear wood finish, oil, or varnish to protect your design.
 Tips for Best Results
- Simplify complex photos before converting (crop out busy backgrounds).
- Experiment with different wood types — light woods like basswood or birch show burned lines beautifully.
- If you’re new to wood burning, practice first on a scrap piece with your design.
 Conclusion
Your Coloring Book Tool isn’t just for coloring pages — it’s a powerful creative helper for artists, wood burners, and DIY crafters. With just a few clicks, you can turn memories, pets, or favorite scenes into beautiful, permanent works of art on wood.
April Turgutalp
Leave a Reply